
If you’ve never done it before, the idea of building a computer from the ground up can seem very intimidating—but it’s one of the most satisfying projects a tech enthusiast can take on. Let’s take a look at Building a Computer from Scratch!
Being more of a software person than a hardware geek, I had never built a PC from scratch. So when I needed a new PC late last year, I took the plunge and built a custom system. I’m so glad I did—the project turned out to be one of my proudest accomplishments of 2020. If you’ve cracked open your PC before to install a new hard drive or TV capture card, but you’ve never built a whole new system from the ground up, it’s not as difficult as you might think. Here are some notes for first-timers who want to build instead of buy their next computer.
Building a Computer from Scratch – Why Build Instead of Buy
“But computers are so cheap these days,” you say. “Why waste the time and energy building your own system when you can get a great machine fully assembled and shipped to your door?” That’s a great question. Building a Computer from Scratch will not save you time. It might save you money, but that’s not even the best reason to do it. For some, it is a fantastic hands-on educational experience. It gives one a deep sense of satisfaction every single day when pressing the power button on the tower. Watch it light up, knowing you plugged in the wire that goes from that light to the motherboard. Building your PC takes the mystery out of what’s going on inside that black box you spend hours per day.
There are other good reasons to build instead of buy, too. With your own build you can customize your system just how you like. Make your perfect media center or gaming machine. You can save money if you already have some parts (or get used parts).
Upgrading your PC in the future becomes easier and cheaper since your parts aren’t tied to a particular manufacturer. With a custom build you can do fun stuff like overclock your CPU and get more bang for your buck! Or, install OS X where it was never intended to run.
In short, building your own PC makes you feel like a badass.
What You’re Getting Into
Don’t get me wrong, though! Building a PC takes research, time, gumption, patience, and a willingness to deal with several WTF moments. Especially for the first time. If you’ve never cracked a PC’s case and installed parts, like hard drives or video cards, start there first. If you’ve got that experience under your belt, you might think that building a new PC is just a matter of snapping together a few parts. It is, but building from the ground up takes much more than an hour or two. My build took two full days, plus:
- several online orders
- two trips to Fry’s and Micro Center
- and one trip to Radio Shack.
If that sounds like a lot, well, it was, and there were moments in the process when I wished I’d just bought a stock computer at Best Buy. But when it finally all came together, all the sweat makes the results even sweeter.
Where to Start: Researching and Buying Your Parts
You scared off yet? No? Good. Let’s get down to it. There are a gadzillion articles on the internet about building your own PC, but many are way out of date, or just don’t get specific about what exactly you should buy.
When I had to start researching what parts to purchase, of course I turned to savvy geeks on the Internet to help me out. Several readers mentioned Ars Technica’s excellent system buyer’s guide, which breaks down exactly what parts you’d want for one of three levels of computer: a “budget box,” a “hot rod,” or a “God box.” The 2021 Spring guide; make sure you use the most recent one when you start your research. I started by plugging parts from Ars’ “hot rod” system list into Newegg to get a sense of price and see if there were any deals, coupons or upgrades. In the end I didn’t use Ars’ exact recommendations, but it was an awesome, up-to-date, jumping-off point.
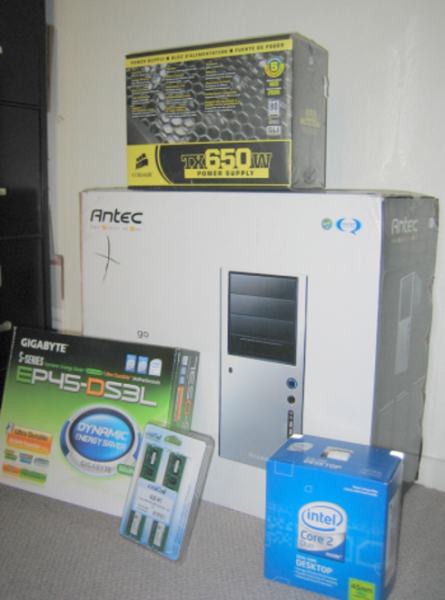
Your research into parts is the most important stage of the process. For first-timers it can be bewildering, and you will have questions. Just keep reading, take notes, consult with forums or sales associates, and remember that if you make the wrong purchase you can always return it for the right one. In the photo to the left you’ll see my build’s case, motherboard, power supply, CPU, and RAM. (I had a video card, DVD drive, and a hard drive from an old machine I planned to use in my new build.)
Get Down and Dirty
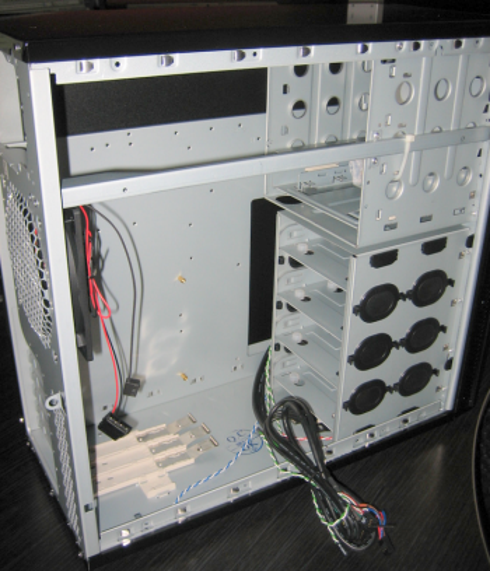
Once you’ve got your hot little hands on all the parts you need, the real fun begins. There are two stages to your build: the hardware stage, and the software stage. How to install each individual hardware component? Here’s the list:
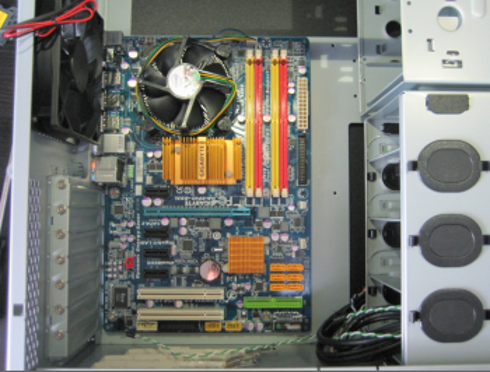
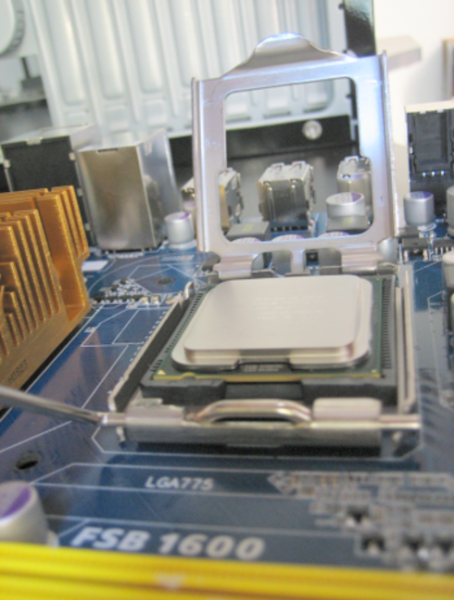
- 1 – Install the motherboard and CPU
- 2 – Install your RAM
- 3 – Install the video card
- 4 – Install the hard drive and DVD drive
Once you’ve got everything plugged in and mounted inside your case, leave the case sides off and plug in your keyboard, mouse, monitor, and power, and press the On button. This is the moment of truth. The first time you see the lights come on and the system setup appear on-screen, you’ll feel like you’ve just arrived at the top of Mount Everest.
If the machine doesn’t power on, or there’s no video signal, or the keyboard doesn’t work—just unplug everything and check your connections. It took me a few hair-pulling, teeth-gnashing attempts to get my new build to boot properly. If it doesn’t work the first time, take a breath, unplug it all, and try again. Some motherboards sound a series of beeps that indicate the problems. Depending on the BIOS make, these codes can be found online.
Once you’re into the machine’s BIOS setup, key around and make sure the motherboard recognizes your USB ports, DVD or CD drive, and your hard drive. You’ll need those working in order to install your operating system. Everything there? Now set your boot sequence to check your optical drive or USB drive first. Insert your operating system’s disc into your USB or CD/DVD drive, and restart the machine. Now your operating system’s setup will launch on boot, and you can install away.
Building a Computer from Scratch – Mistakes I Made That You Can Avoid
When you build your first PC, keep a few things in mind I wished I’d realized before I started.
- Beware of the “Frankenbuild.” A great way to save money on your new PC is using parts that you’ve already got around. But I was overly optimistic about what items from my very old Dell tower would work in my new system. I assumed my hard drive would work (it did, but it was an IDE drive, which I wound up replacing with a faster SATA model), I hoped my video card would work (it didn’t), and I thought my DVD drive would work (it did). In the end I wound up buying parts I thought I’d be able to reuse, so my total price wasn’t as low as my initial estimate.
- Expect mishaps. I bought the wrong motherboard. Well, not the wrong one, but one that didn’t have a FireWire port, which I wanted. Well, I had a FireWire card, but it didn’t fit into the motherboard. Anyway, I figured all this out after I installed the CPU, which meant I had to remove it from the board, break the thermal compound seal, and ship the motherboard back. When I got the new motherboard and reinstalled the CPU, because the thermal compound left there didn’t work anymore, the machine would start and within 10 seconds overheat and shut itself off. Next thing you know I’m scraping hardened thermal compound off the CPU with Goof Off and a credit card, and reapplying fresh from a tube I had to pick up from Radio Shack. Lesson: there will be mishaps. Expect crap to go wrong. Be confident in your ability to fix it after you Google the solution to the problem hundreds of people have had before you did.
- Read the freakin’ manual. With years of tinkering in my PC’s case under my belt, I went into my build eager to start working and only skimmed the user guides and online howto’s before I started. Don’t do that. Open and read the full-on manual that comes in the box with every single one of your parts. If you’re not sure about something said manual includes, do your research before you plug anything in.
- Buy locally if you can. My initial parts order was from Newegg, which was great price-wise, but really sucked when I had to return my motherboard, because I had to pay shipping fees and a restocking fee. With a Fry’s down the road, I regretted not just buying everything at the store itself from the get-go to make returns easier.
- Give yourself lots of time. I wrongly assumed I’d be able to finish my build in a day, but it took two whole days and stressed me out because they were work days. Don’t build a new PC when you’re on deadline or otherwise pinched for time. Give yourself a whole weekend and a clean and spacious work area that you can leave filled with packing debris and electronic parts strewn about for a few days.
Have you built your own PC? Are you considering taking the leap? Building a Computer from Scratch can be an adventure!


