
PC building mistakes – Avoid the common ones
This handy-dandy guide can help you avoid the most common PC building mistakes—and their associated frustrations.
Few things in life are as satisfying as building your own PC. Cobbling together a softly purring, fully functional computer out of disparate parts offers a true sense of creation. Even better, rolling your own results in a cheaper and more personally tailored PC than what you can find at big-box stores.
Building a PC sounds daunting, but it’s actually pretty straightforward. Still, a few key details can trip up even seasoned geeks who are not being mindful.
Before you buy
Pay attention while you’re buying your components, or your DIY PC could wind up borked with multiple PC building mistakes before you even begin.
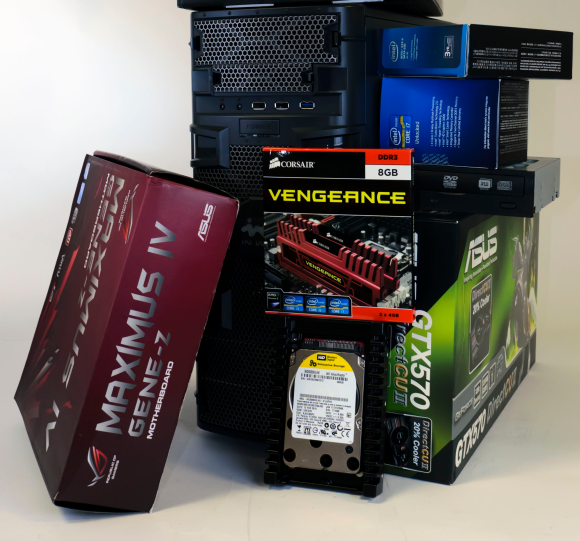
The start of something beautiful – Without PC building mistakes!
Not all PC parts are compatible with one another. The most obvious example is the relationship between processors and motherboards. For instance, Intel’s second- and third-generation Sandy Bridge and Ivy Bridge chips need a motherboard compatible with the LGA 1155 socket, while the fourth-gen Haswell chips use LGA 1150 and the enthusiast-focused Extreme Edition processors require pricey socket 2011 motherboards.
Do Your Homework to Avoid PC building mistakes!
You could do your homework—or you could just hit up PCPartPicker.com. This helpful website indexes virtually every PC component you can buy to help you plan out your build, and it informs you of any part incompatibilities. It also points you to the lowest available prices for said components.
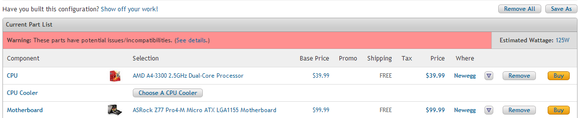
PCPartPicker.com warns you if the components you select aren’t compatible. (Click to enlarge.)
Don’t get miserly while selecting a power supply. It would hurt to spend all your time getting a rig together only to have it wither under the electrical load. Check out power supplies HERE, and head to Thermaltake’s superb power supply calculator to estimate how much juice your rig will suck down. If you’re buying a graphics card that needs to connect to your power supply via one or more six- or eight-pin power connectors, make sure that your chosen PSU has them.
Another common mistake is forgetting all the “little extras.” Be sure to buy any additional cabling you might need, such as SATA cables to connect the storage drives and the graphics card to the motherboard. (Check to see which cords come with your motherboard first, though.) Pick up a tube of quality thermal paste—I prefer Antec or Arctic Silver. If you plan to install an aftermarket CPU cooler, the single-use tubes that come with many CPU coolers are of low quality and limited amount. Avoid this problem if you make a mistake while mounting your cooler and need to start over. Remember to include a disc drive!
Finally, check out the dimensions of your gear to make sure the pieces will fit in your chosen case. Aftermarket coolers and top-end graphics cards take more space than you might think. Even mid-range graphics cards could have trouble squeezing into some compact cases.
Before you build
While you’re pulling all of your pieces out of their boxes, be sure to keep track of the plethora of screws and cables you’re yanking out with them. Building a PC involves a lot of tiny screws, and they’re not always the same type of screws. Stay organized.
Most of the PC building process itself should be straightforward, especially once you read the manuals. Following the installation instructions on a multi-hundred dollar investment is a must, even if you’re a DIY vet and you know what you’re doing. Building a PC is an intricate, methodical process, and missing a crucial step early on could mean disassembling your entire machine later.
Preparing the motherboard (No PC building mistakes here!)
Now for the fun part! It’s time to roll up your sleeves, dive in, and—stop. No, seriously. Before you install your first component or do anything else, take your motherboard’s I/O shield—the cover for the ports on the rear of the PC—and install it in the case now. If you forget to install the I/O shield, you’ll have to pull the entire motherboard out sometime down the line to put it in its rightful place, and that’s a big headache.
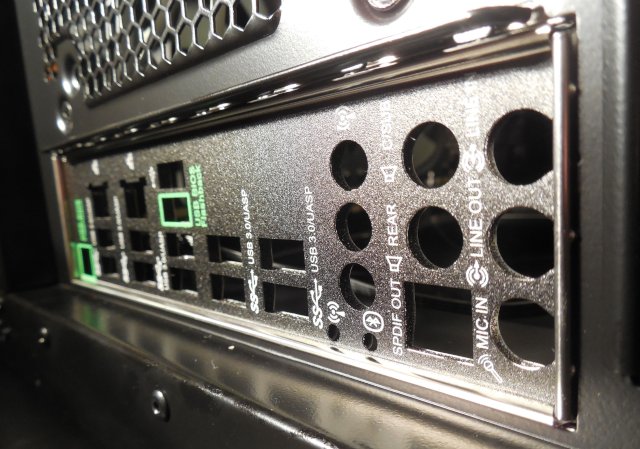
Seriously: Get that thing in NOW.
The CPU
As for the main parts, the CPU is the heart of your PC, and you’ll want to install that first. The process is fairly straightforward. Just make sure that both the processor and the socket you set it into are clean before you install it, and be gentle.
Once that’s done, the next natural step would be to install the CPU cooler. But hold your horses! If you’re using an aftermarket cooler rather than the small, stock cooler Intel or AMD provided, install your RAM first. A large cooler can make it difficult to insert RAM into the memory slots after the fact.
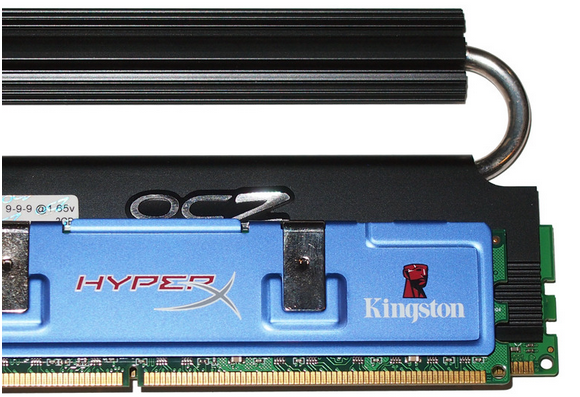
About the RAM
Enthusiast-class RAM modules with higher clocks sometimes have taller heat spreaders, which can bump against larger aftermarket CPU coolers. If your CPU cooler is massive, you might need special low-profile RAM.
The most common mistake when installing RAM is simply not reading the manual. Does your motherboard favor dual-, quad-, or triple-channel memory configurations? Placing the memory sticks in the correct manufacturer-appointed slots is crucial, too: If you don’t do your homework, your system could wind up using a single-channel configuration instead, which will drag down performance.
RAM in place? Okay, now it’s cooler time.
Cooler installation tosses a few curve-balls at you. The cooler’s heat sink sits atop the CPU to draw heat away from the processor, with a thin, air-bubble-free layer of thermal paste between them. Some coolers, including stock AMD and Intel models, ship with thermal paste applied. In contrast, most aftermarket coolers require you to apply your own thermal paste.
Using too much or too little thermal paste could lead to heating woes down the line. Plop a roughly pea-size dot of paste in the center of the CPU for best results. And don’t forget to peel the plastic off the CPU heat-sink in aftermarket coolers!

You don’t need much thermal paste to create a solid, bubble-free seal.
Speaking of which, if you’re using an aftermarket cooler with a tower-style heat-sink design, be sure to position the cooler’s fans so that they point at the exhaust fans at the rear or top of the case. You don’t want all that hot air blowing around inside the case—or worse, blowing directly at your pricey graphics cards.
Bringing it all together without PC building mistakes!
With the previous steps done, it’s time to place the motherboard in the case. Well, almost. (Your motherboard’s I/O shield is in, right?)
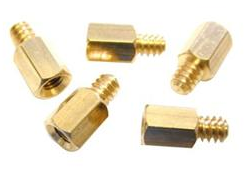
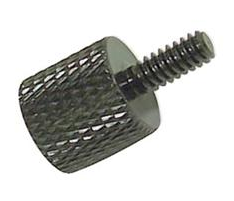
Your case came with brass risers (or “standoffs”) designed to keep the metallic side of the case away from the motherboard. Forgetting to insert those and flipping on the power could fry your PC’s components, so don’t forget them. Screw in the risers until they’re finger-tight, but don’t make the mistake of over-tightening them, because brass threads are oh-so-easy to strip. And once again, read the manuals to ensure that you install only the risers you need. The risers you put in the case have to match up with the mounting holes on the motherboard.
Unless you’re working in an ultra-small case and have a compelling reason to do otherwise, install the power supply before you slap in the motherboard. Space can get cramped in a case once the motherboard is in place.
From here on out, everything is pretty simple.
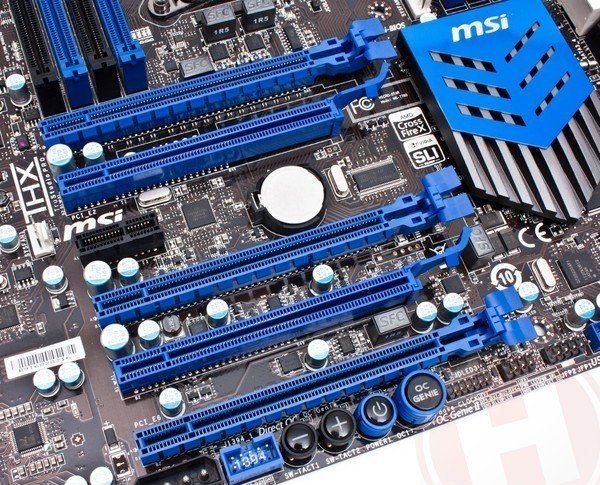
Not all PCI Express x16 slots are created equal. Two slots on this Intel motherboard look similar, but one features a full 16-lane electrical connection, while the other has only 8 lanes.
The only major mistake you might make at this point is installing the graphics card in the wrong PCI Express slot. While many motherboards sport several physical PCI-E x16 slots, some of those may offer only PCI-E x8 capabilities. Always install your graphics card in the slot closest to the processor. This ensures the best performance. Consult your motherboard’s manual to puzzle out the best use of other PCI-E slots if you’re installing multiple video cards.
Beyond that, the most common mistake is failing to think about cable management while you wire everything up. A clean case not only looks gorgeous but also has better airflow—a crucial aspect in keeping your PC nice and chilled. Think about how you’re going to route your SATA cords, power cords, and other connections as you install them. Try to tuck as many as you can behind the motherboard tray, and remember: Twist ties are your friends!
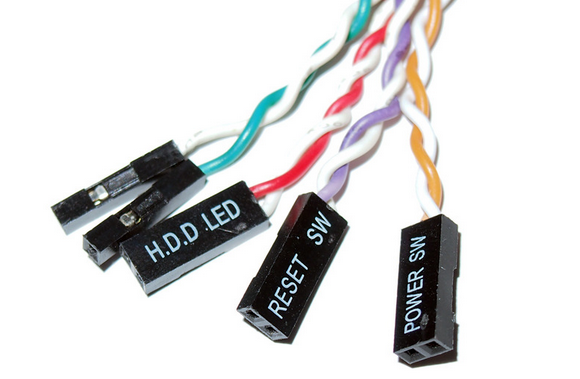
A Word About Wires!
It may seem counter-intuitive to anyone who has ever taken a basic electronics course: The white wire in the front-panel connectors on most cases is the negative lead.
The final PC building mistakes — forgetting to plug something in—trips everyone up at least once. All it takes is a single poorly seated connector to
- prevent your computer from booting
- introducing pesky ghosts into your machine.
Once you have installed all your components, give the case a thorough once-over. Ensure that everything that should be plugged in is plugged in, and plugged in correctly. Internal connectors often have positive and negative leads that you must connect in a specific way. When in doubt, read the manual, and remember to connect your motherboard and graphics card to your power supply!
Further reading
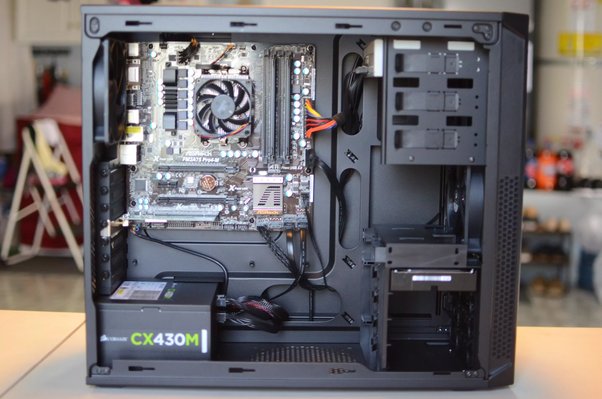
The end result: Functional, clutter-free, and gorgeous.
Following the tips above should help you avoid the most common—and most frustrating—PC building mistakes. If you’re looking for cheap used PC parts to start your DIY project, check out the available parts HERE! Now get to it!
